Thursday, 8 July 2010
Tuesday, 6 July 2010
Advertisement Deconstruction


From the adverts I have looked at I have found many common features. One of these is to obviously advertise the album. At the same time they contain something similar to the albums cover so that anyone looking for the album can easily find it. They also have the bands record label somewhere on the advert. Every advert I looked at appeared in a media that was relevant to the bands target audience.
The advert I have chosen to look into more is the advert for Plastic Beach by Gorillaz. The image used on the advert is directly from the albums cover and depicts a plastic cliff with a house on top with many toy like ships, docks etc. underneath. The font is taken directly from the album and due to its positioning and wavy appearance looks like it is part of the water surrounding the ‘plastic beach’. These help to represent the icon of the band as the band themselves are animated and so are technically fake just like the ‘plastic beach’. From this I can tell that the band is more underground as the label is located at the bottom of the poster but is tiny and is not a very well known label. This poster also shows that the band aim their music at a specialist audience who like their music to be mixtures of multiple genres.
Wednesday, 30 June 2010
Shot Count - "Maximum The Hormone - Zetsubou Billy"
Amount of Cuts: 102
MEAT Shots: 40
Type of Shots: Medium close up, wide shots
Type of Camera Movement: Shaky, handheld, and steady.
Friday, 25 June 2010
Sunday, 20 June 2010
Tuesday, 25 May 2010
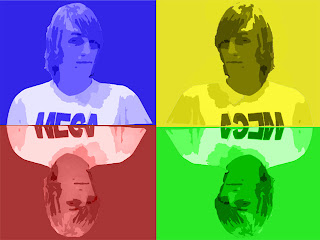
Warhol Tutorial

Firstly I got the photo that I wanted to use. I then proceeded to load it up in Photoshop. I went to Filter -> Blur -> Smart Blur. To acquire the look that I wanted I had to set the Radius to 40 and the Threshold to 15. After this I selected the layer of the photo and once again selected the Filter menu only this time I selected Artistic -> Cutout and set the level to around 4-6, the edge simplicity to 1 and the fidelity to 1. I then cut out the image of myself using the Magnetic Lasso tool and created a separate layer for it. On the old layer I filled it with one single colour. I then selected the layer with the image of myself and chose the Colour Replacement tool and selected the colour I had used for the background and colour the image of myself with it. I did this a further four times and combined each image to create the image you see.
Friday, 21 May 2010
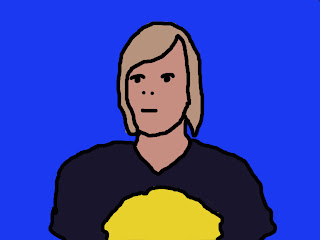
Opie Tutorial

This is my first attempt at making an Opie style image on Photoshop. I used multiple tools to create this image. one of these was the Magnetic Lasso tool. I used this to select parts of my image to make into separate layers. I used the Paint Bucket tool to fill in the layers with the colour that I wanted to use. I used the Pencil tool to do clean up and the eraser to remove any mistakes. Finally I used the dropper tool to take a sample of the colour of my hair, face etc. so that I could fill in my layers with all one colour
Subscribe to:
Posts (Atom)